Sunday, March 05, 2017

Easy Hainanese Chicken Rice. Almost fool-proof!

When you are out for a playdate and need to prepare dinner, what do you do?
You make Easy as A-B-C Hainanese Chicken Rice!

This is an easy version or rather, cheat version that comes out from a desperate mom who wants to go for her playdate (I mean the kid's playdate) and cook dinner for the family.

Try this out and you will be amazed how simple and delicious this recipe is.
The soup was made from boiling the chicken and to make it even simpler, I added anchovies and kelp to "season" the soup so you do not have to add in further seasonings = healthier :)

Disclaimer: If you are on a diet, please refrain from cooking this - It is addictive!


To make this, you will need:

For the Soup/Chicken:
  • 1 whole raw chicken
  • Dried anchovies (Substitute with Chicken stock if you want REALLY EASY way)
  • Kelp
  • Dried Scallops
  • Corn
  • 2 stalks Spring onions
  • 1.5L water
  • Parsley (for garnishing)
  1. Wash the raw chicken with salt and rubbed intensely - This helps to get rid of feathers and make the skin really smooth.
  2. In a slow cooker (I used magic cooker), add in 1.5L of water.
    If you decides to go with Chicken stock, omit step 3 -4 .
  3. Wash and drain the dried anchovies, kelp and scallops. Add them to the pot of water.
  4. Wash and fold the spring onions and stuffed it into the chicken body.
  5. Add the chicken to the pot of water, together with the corn.
  6. Leave to cook for at least 2 hours.
  7. Once cook, take out the cooked chicken and leave it to cool.
  8. Chopped it up and assemble on a big plate and garnish with parsley.
  9. With the broth in the pot, add in your desired ingredient ( I added fish balls and Enoki mushrooms).

For the rice:
  • Soup Restaurant's Samsui Ginger paste (You can get it here
  • Raw rice 
  • Pandan leaves (Optional)
* I cooked 3 cups of rice using half a bottle of Samsui ginger paste*
  1. As how you would cook your rice, add in half bottle of Samsui ginger paste into the rice and mix well.
  2. Add in Pandan leaves and switch on your rice cooker till done.

For the Chilli sauce:
  • 3 tbsp Belacan Chilli paste
  • 1 lime
  • 2 tsp white vinegar
  • 1 tbsp sugar
  • 1.5 tsp minced garlic
  1. Mix all the above

Tuesday, January 26, 2016

Lately

What I have been doing lately in the Kitchen ✌


Korean Bibim Guksu (Spicy Mixed noodles)

Korean Kimchi Pancakes

Korean Seafood Pancakes

and I finally set a time to bake my CNY Pineapple tarts :)

Thursday, October 22, 2015

Rilakkuma Pull apart bread

It's been a long time since I attempted bread making. I am a bread person and making good, tasty and fluffy bread is an art which I think is really hard to pursue and master. Even having lessons could not yield me the kind of soft fluffy breads that we get from local bakeries.

The breads that I used to baked are usually good on the day itself but they turned really heavy the next day which is something I am not looking forward to. Another reason to why I am not into bread making is because Baby Kwok #1 and Prince Charming hated breads so much that it just turns them off LOL! No idea why but I guess its because they dislike the constant chewing.

Recently, there was this huge craze over Japanese pull-apart breads where the bakers attempted to convert these breads into really cute and interesting characters. I super love the ones for Totoro and happen to come across 2 floggers who did Rilakkuma version.

I went to my usual Youtube subscriptions and tried my luck searching for a good fluffy rolls recipe. Happened to view the video by Bakingwithmi who shared her dinner rolls recipe and I decided to create my own pull-apart bread with her recipe.

Like I mentioned above, the breads were good on the day itself. I swear they were so soft and good but when I tried them the next day, they became really heavy :( Sigh.. When will I be able to get really good fluffy bread that can stay soft for 2 days at least? If you have a foolproof recipe, please share with me!

Here's my own Rilakkuma pull apart bread :)
I took the tip from Bento days by baking these rolls in a chiffon pan.
 Gracious me forgotten to greased the pan and the bread were stuck terribly :/

If you are interested to try Bakingwithmi's dinner roll recipe, please hop over to her channel in youtube :) 


Sunday, September 06, 2015

Pandan Chiffon Cake

I am getting the momentum of resuming my blogging lifestyle - Something that I used to do it really often before embarking into Motherhood. As much as I would like to update my blog like how I chase after the kids, I just could not get the time properly organized. Sleep is often deprived and "myself" is no longer in the dictionary - I am sure mummies out there definitely agree with me, well maybe some.


Anyway, I have been tempting to bake a Pandan Chiffon cake because this is one of the cake that I hardly bake (For your info, once in my baking journey). I roll my eyes at the moment I learnt that it is an essential to make your own Pandan juice (Screwpine juice). The thought of dragging that bulky food processor just turns me off but for no reason (I really do not know why) - I felt really enthusiastic to make one yesterday and so yes, I dragged my big butt to the nearest Supermarket after we came back from lunch and bought a bag of Pandan leaves and you got it! I MADE MY OWN PANDAN JUICE! Wheeeeeee!


The Pandan Chiffon was really soft and fluffy!
Btw, Super adore the dining cloth that I got from Typo sale! It cost merely $3!


To make this, you will need:
  • 8 Egg yolks 
  • 70g Sugar
  • 140g Fresh Coconut milk (I used the chilled kind)
  • 110ml Oil (I used Canola)
  • 2.5 Tbsp Pandan juice
  • 1 tsp Vanilla extract
  • 1 tsp Baking powder
  • 1 pinch of Salt
  • 200g Cake flour

  • 8 Egg whites
  • 100g Sugar

To make Pandan Juice - You will need 10 finely chopped Pandan leaves with 40ml of Coconut milk. Blend the ingredients using a food processor. With the help of a sift, sieve the mixture to extract the Pandan juice. You may opt to use your hands to squeeze the juice out from the mixture otherwise.

  1. Preheat your oven to 180°C
  2. Sift the cake flour and baking powder. Set aside
  3. In a bowl, beat the yolks and sugars till pale yellowish. Add in the oil, vanilla extract and pandan juice. Continue to mixt till well combined.
  4. Add in the sifted flour and salt into the mixture and mix to ensure no lumps.
  5. In a clean dry bowl, beat your egg whites till frothy. Gradually add in sugar and continue beating till you reaches soft peak stage.
  6. Take 1/3 of the egg white mixture and incorporate into the cake batter mixture. Pour the mixture back to the remaining egg white and fold well.
  7. Pour your mixture into a 23cm Chiffon pan. Tap the pan against the table top to release air bubbles.
  8. Bake for approx 35-40 mins depending on your oven temperature.


Monday, August 31, 2015

Fluffy soft Banana cake

That bunch of bananas have been lazing on the kitchen top for 2 days. I regretted getting such a big bunch forgetting that bananas ripe way too fast in our tropical weather. Banana is one of Baby Kwok #1 favourite fruit. He can eat them EVERYDAY for breakfast - No, he does not find them boring. He even told me he would not mind having them again the next day (on repeat mode).

As a mum, I would not want my children to overly indulge in one particular food. I hope they can widen their food choices and learn not to be as fussy as the mum (oppss) during her younger days. Vegetables still a tough one to conquer for Baby Kwok#1 but well, at least he eats the really soft broccoli without any complaint (well, maybe one or two). Baby Kwok #2 is more adventurous with food but she seems to be really fussy lately! Used to love eating meat and now spitting them out! Grrrr..... I hope it is just the teething phase.

Anyway, back to banana - So not to waste those bananas, I baked a banana cake! I was not expecting much praise from Prince Charming because 1. He does not really like eating banana as much as his son do. 2. He has been complaining to me about his weight. He was with all praise for this banana cake!!!! I should have asked him to draw 4 numbers for me :X

Been into Instagram lately. If you are keen to follow me, add me!
You can search under @Orangejimbo


To make this, you will need:

  • 2 ripe Bananas, Approx 220g
  • 85g Sugar
  • 100ml Oil (I used canola oil)
  • 3 egg Yolks
  • 1 tsp Vanilla powder
  • 1 tsp Baking powder
  • 150g Cake flour

  • 3 egg Whites
  • 25g Sugar

  1. Mashed the bananas finely and set aside. Preheat your oven to 180°C
  2. Sift the dry ingredients (Flour, Baking powder & Vanilla powder)
  3. In a bowl, beat the yolks and sugar till it turns pale yellowish. Slowly add in the oil and mashed bananas. Continue to beat till well combined.
  4. Add in your sifted dry ingredients and mix well. Ensure there are no lumps.
  5. In a clean dry bowl, beat your egg whites till frothy. Gradually add in the sugar and continue beating it till it reaches Soft peak stage.
  6. Take 1/3 of the egg white mixture and incorporate into the banana mixture. Pour the mixture back to the remaining egg white and fold well.
  7. Pour into a cake tin and tap against the table top to release bubbles.
  8. Bake for approx 35-40 mins or when skewer comes out clean. 


Friday, May 22, 2015

Still alive.. the blog i mean :)

Although I have not been posting much recently, I did not give up on my kitchen or rather my oven.
Have been on/off doing some small bakes for the kids, family and friends. Trial tested a few macarons recipes but failed (feet visible but uneven or macarons did not rise the way I wanted), went for a Macaron class that specialized in Character macarons (Tsum-Tsum, Monster Inc, Totoro etc).

I have to say - most of the time I was busy figuring out the best/perfect Macaron recipe that works well for me because being someone who is on the visual side - I have my own expectations on how I would like my macarons to look like.

Prince Charming has been really supportive because for every batch of Macrons that I baked - It means he has to be the 1st guinea pig to sample them (Giggling) and then down a few weeks, you hear him complaining that he gained a few pounds (LOL), and to my pleasant surprise, I also have my little royal supporter - Baby Kwok #1!

It is amazing that every time I put on my baking apron, his eyes sparks and started his reasoning with me on why he should help me out in the kitchen. Technically, I love to have him baking with me but theoretically I preferred not to. I had previous scared to death experience where we were baking halfway through and he opened up the oven! Of course, I was not worried about failing the bakes but I was so afraid that the high heat coming out from the oven might hurt him. I guess I'll need to wait till he is much older before I brace enough courage to let him do some simple baking with me again.

Anyway, not a good writer so I shall stop my typing here. Pictures shall do the talking ;)

Pineapple tarts using Sonia's recipe. Love the Melt-in mouth texture!
Shared this recipe with my colleague who went crazily addicted to them.


The famous Ogura cake. Referenced Jennie's recipe but made some modification.
For mine - I replaced milk with Chocolate Soy milk and added Cocoa powder.


One of the Macaron recipe that I tried. Feets were visible but just not the kind that I wanted :/
Batter was undermixed as well - See the "nipples" on each macarons?


Went for a Macaron making class with one of July 2013 mummy. :)
It was a tedious class - My neck was so sore from looking down for 3 hours!


Saw a video on Facebook and decided to attempt it for breakfast because it is so simple!
Original recipe calls for Tomato puree as the spread and mashed Avocado for borders.
Mine was a simplified version -Tostitos Creamy Spinach dip as the borders, egg and Swiss cheese.


Another recipe that I tried for Macarons - Love the feet but the macarons were not even. Some of the
sides had no feet and they were hollow. Prince Charming took a bite and it went down his shirt.


Now.. here is my perfect Macarons (in my personal opinion)! Love the feet and overall.
Easier than most recipes and it managed to survive in a humid environment!


Same recipe with different flavors - This was a green tea buttercream


This was Chocolate buttercream! The texture of these Macarons were crispy on the outside and chewy on the inside.


Now that I mastered the art of making Macarons, Prince Charming requested for them to bring to work. I used the egg tray to store these macarons :)


Thursday, January 01, 2015

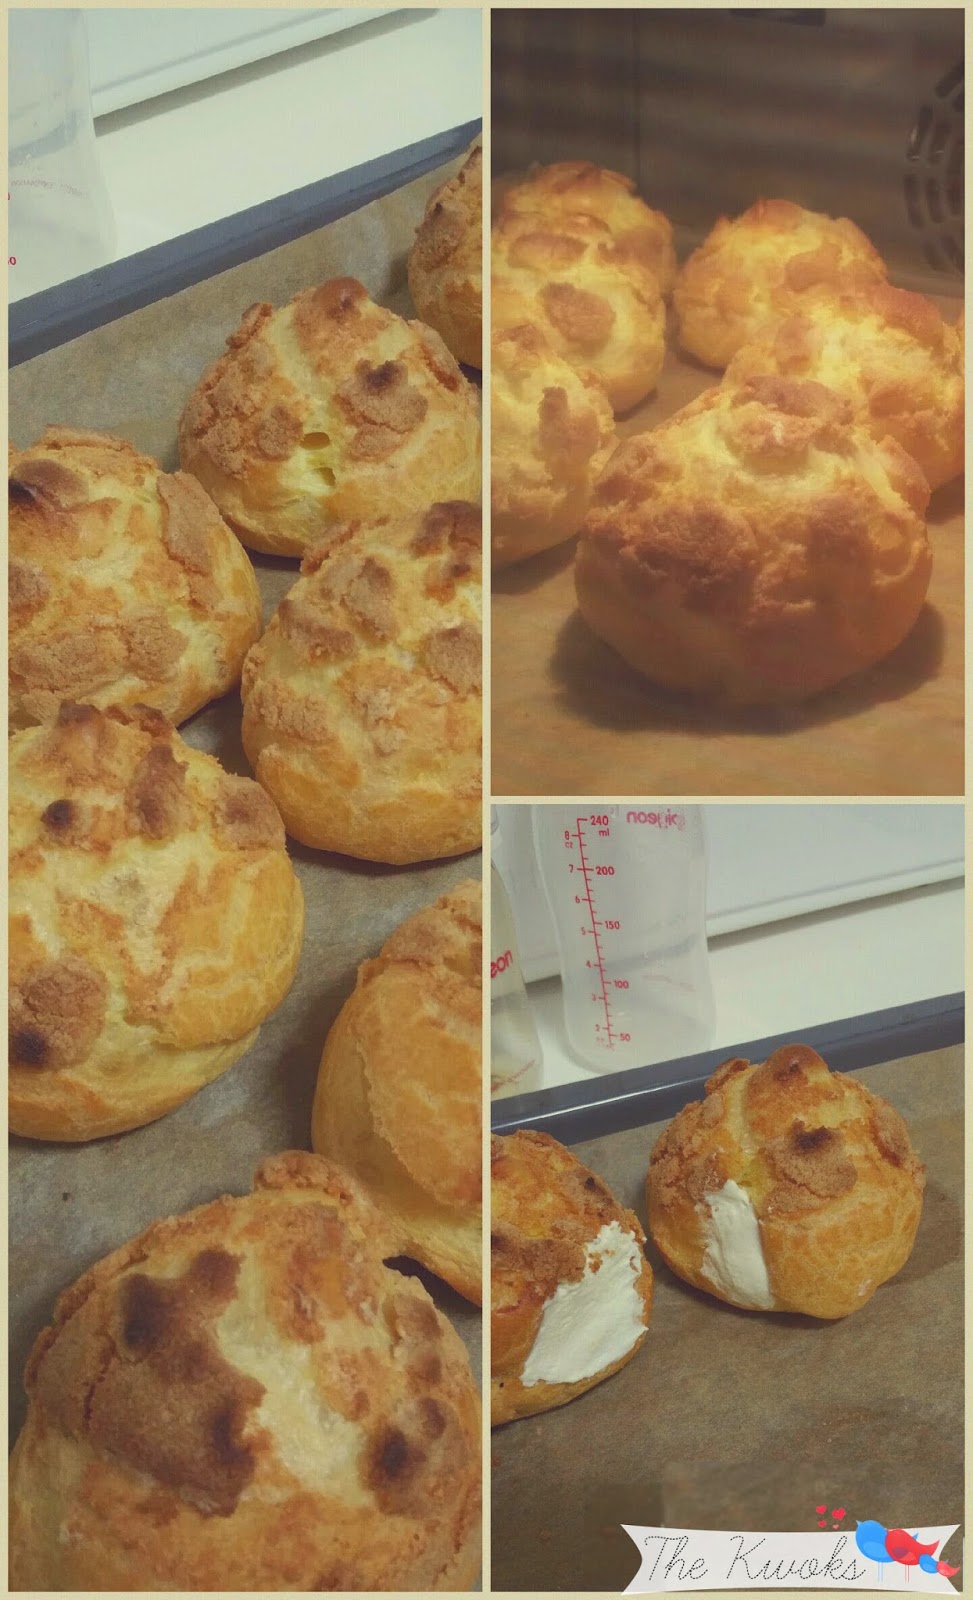
Beard Papa's style Cream Puffs

On the very last day of 2014, apart from spending quality time with Baby Kwok #1 ( Opps.. Baby Kwok #2 was with her babysitter) I actually did something that was not intended to!

I.....Made....Beard Papa's style.....CREAM PUFFS!
Prince Charming and Baby Kwok #1 are both fans for Beard Papa's cream puff mainly because of the cookie dough shells. They are pretty expensive in my opinion - $2.50 for a normal custard filling and $3.80 for a speciality flavour (e.g. Durian)

With a cost for about 5 pieces of Beard Papa's puffs, I easily made about 11 puffs which means its almost 50% savings! Cheapo mummy on the run! LOL!

Anyway, I was really happy with the puffs because my family enjoyed them and I get good reviews on how it looked like the ones from Beard Papa! Something to make the last day of my 2014 so worthwhile!


Note: Custard cream and Cookie Dough should be made in advance before you start preparing for the shells.

To make these, you will need:

Shells
- 120g Butter
- 3/4 cups of Water (Approx. 170ml)
- 1 tsp Salt
- 1 tsp sugar
- 1 1/3 cups of Sifted Flour (Approx. 190-200g) 
- 5 Eggs (Mine is about 58g each)

1. In a pot, add water, butter, salt and sugar. Bring to boil and ensure that the butter are distributively
    melted.

2. Remove from heat and add the flour into the mixture. Stir well and ensure that the batter is lump 
     free. Put onto the stove to further cook. Cook for approx. 2 mins.

3. Stir well and let the steam go off from the mixture before adding in the eggs. Remember to add 1
     egg at at time so that the mixture corporates well.

4. Pour the mixture into a piping bag and pipe onto a tray lined with baking paper. Add the Cookie 
     dough over the mixture. 

5.  Bake for 22-25 mins or until puffs are raised nicely and golden.


Cookie Dough
- 30g Butter
- 1/3 Cup Icing Sugar (Approx. 50g)
- 1/3 cup Plain flour (Approx. 50g)
- 1 tsp Baking Powder
- 2 Tbsp Veg oil (Optional)

1. Melt the butter in a sauce pan.
2. Combine the dry ingredients into the melted butter and mix well till it forms a dough.
3. Keep the dough in a ziplock bag for later use.

Tips: If you realised that your cookie dough is dry just before applying to the shell mixture, add in 2 tbsp of Veg oil and combine well with the dough. 


Custard Cream
- 3 Cups Full cream milk
- 1/2 Cup of Flour (Approx. 70-80g)
- 1/2 Cup of Sugar ( Approx. 110-115g)
- 4 Egg Yolks
- 30g Butter
- 1 tsp Vanilla Extract
- 1 Cup of Whipped Fresh cream

1. Beat the yolks with about 50ml of the milk.

2. In a separate bowl, combine the flour with the sugar. Add the yolk mixture to it.

3. Mix well and add in the remaining milk.

4. Cook over stove on medium heat till the mixture get thicken. You should be able to see ribbon
    trails when you stir the mixture. It should look like a normal custard cream but slightly thicker. The
    thick consistency will ensure that the custard filling will not flow out from the shells while pipping.

5.  Add in the butter and vanilla extract and stir well. 

6. Cover with a cling wrap touching the surface of the mixture. This will prevent a thin film from 
    forming on the surface while cooling.

7. Before pipping, mix the fresh whipped cream into the custard cream. The texture would be like of 
    a thick melted ice-cream. It pretty taste like Ice-cream too :)


To assemble:

1. Ensure that your shells are fully cooled before you start pipping the custard filling

2. You can use a toothpick to poke a small opening at the sides of the puffs OR if you find that a 
     hassle like how I feel (actually I am just being lazy), simply use a long pipping tip to create a   
     opening while pipping the cream.

3. Dust the cream puffs with icing sugar before serving OR you can choose to serve them cold. I
    popped my puffs into the freezer for about 3 hours and they tasted like ice-cream puffs! 


To end this post, I like to wish all my readers a HAPPY 2015! May 2015 be a better and fulfilling year for all of us and till then, may I be blessed with more baking posts (If the little ones allow). Hahaha!

Monday, November 03, 2014

To-Bake List 2014/15


Made from Scratch Strawberry cake
http://thekitchenmccabe.com/2014/10/09/made-scratch-strawberries-cream-cake/

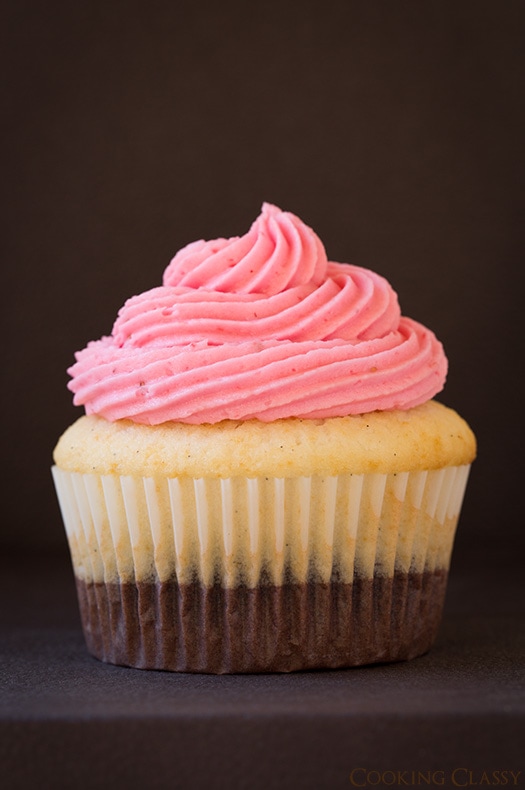
Neapolitan Cupcakes
http://www.cookingclassy.com/2014/09/neapolitan-cupcakes/

Mini Brownie Butter Cakes 
http://rasamalaysia.com/mini-brownie-butter-cake-recipe/

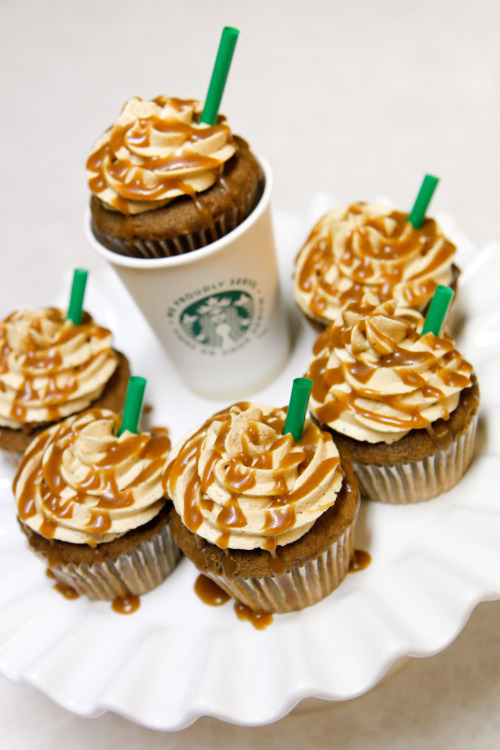
Starbucks Cupcakes
http://natventures.tumblr.com/post/18062563920/starbucks-cupcakes

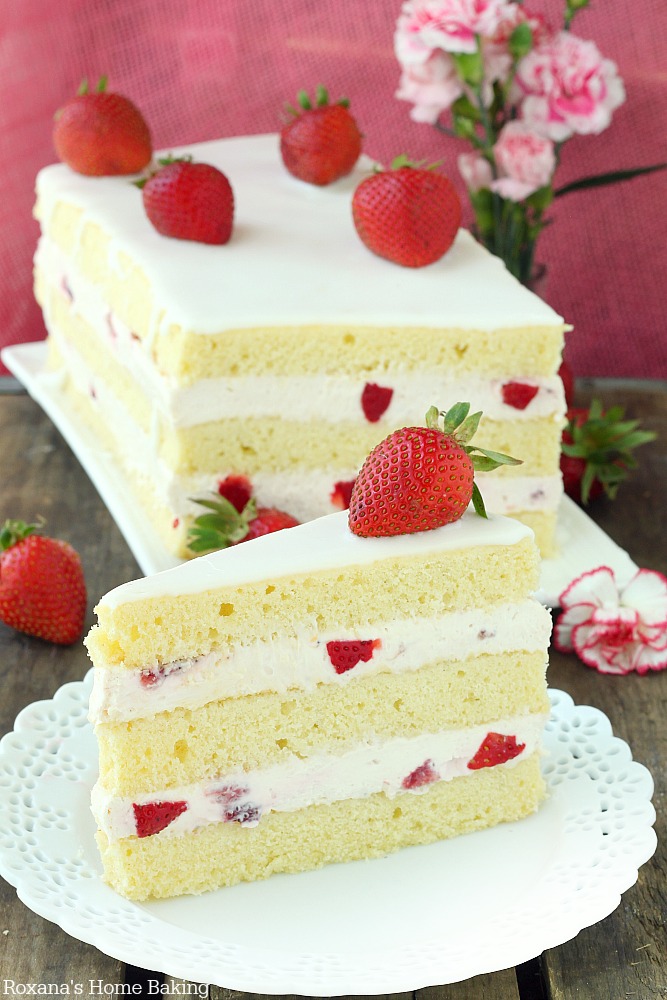
Strawberry Shortcake
http://roxanashomebaking.com/strawberry-shortcake-cake-recipe/

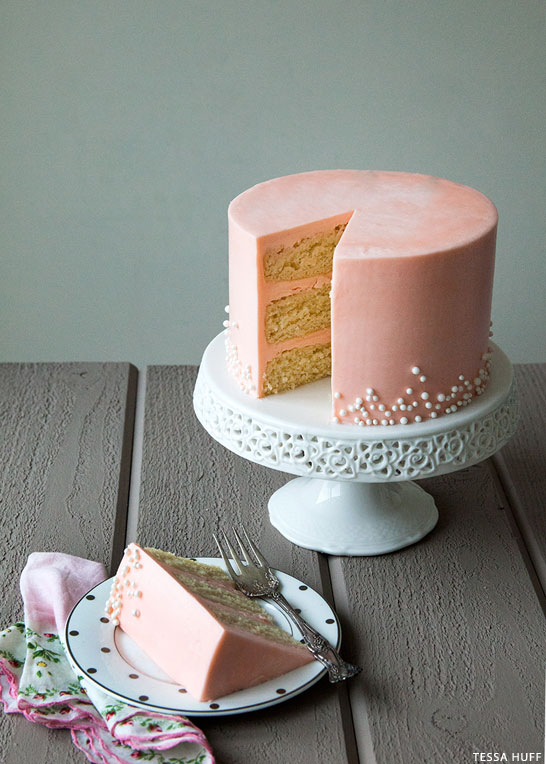
Rose Buttercream Cake
http://thecakeblog.com/2014/02/rose-water-buttercream-cake.html

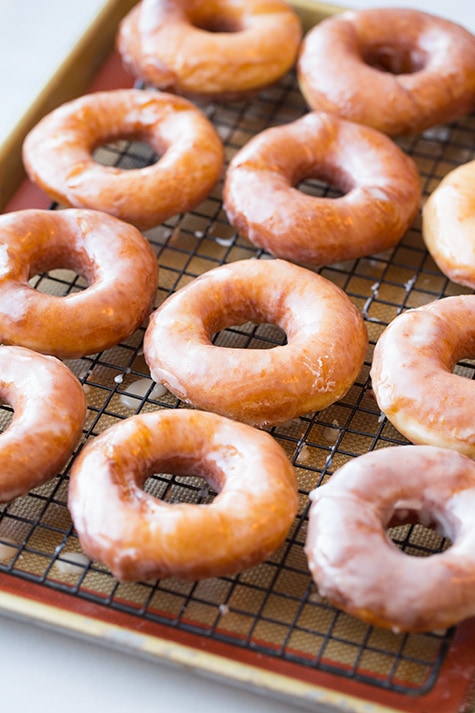
Copycat Krispy Kreme Doughnuts
http://www.cookingclassy.com/2014/01/copycat-krispy-kreme-doughnuts/

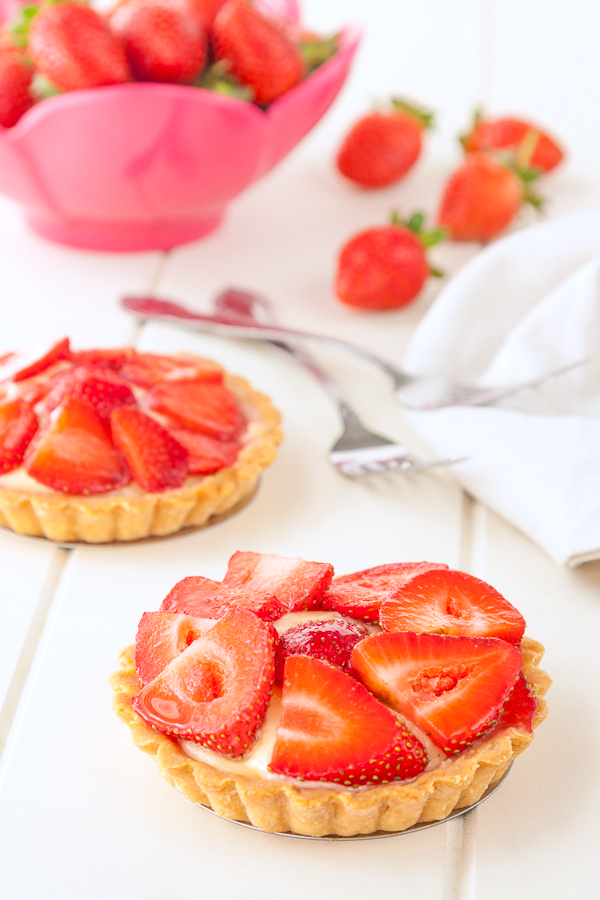
Strawberry Custard Tarts
http://www.deliciouseveryday.com/strawberry-custard-tarts/#_a5y_p=1376486


Thursday, September 04, 2014

Happy Teacher's Day 2014

Ordered a batch of honey for Baby Kwok #1's teachers in school as their Teacher's day gift. However, got a shock at how mini they were so Prince Charming suggested baking something to go along with the honey. Had a big bag of Granola sitting in the fridge so I thought, maybe a Granola fruit muffins but ended up, I forgotten to add in the granolas! 


Been getting really forgetful nowadays. Anyway, the muffins were also Baby Kwok #1's breakfast as well as Prince Charming. Both gave their thumbs up for the muffins! I ate one and was also surprised at how flavourful these muffins were. The best thing that I ever heard from the Prince Charming "Hey, they looked so cafe styled and they really taste so good. Like those we get in Starbucks or angmoh bakery!" 

On a side note, I should have been more generous with the crumble toppings. They were so so so good and goes so so so well with the muffins!

Look at those mini honey! 


Love these cupcake liners and toppers that I got from one of the online shop :)

Baby Kwok#1 loves those cubed size plums! 
They were organic and taste really fresh!

To make these:

Muffins
  • 195g All purpose flour (US metric 1 1/2 cup)
  • 65g Caster sugar (US metric 1/2 cup)
  • 1/2 tsp Salt
  • 2 tsp Baking powder
  • 1 Egg (approx 55g)
  • 100g Milk 
  • 70g Oil
  • 2 Organic plums, cut into bite size
Crumble toppings
  • 60g Butter, melted
  • 45g All purpose flour
  • 50g Brown coarse sugar


  1. Combine the dry ingredients together and set aside.
  2. Preheat your oven to 200°°C
  3. Meanwhile, combine the ingredients for the crumble toppings and mix till it resembles crumbs like mixture.
  4. In a mixing bowl, mix egg, oil and milk. Add in the dry ingredients and mix well.
  5. Mix in your plums and mix gently. Pour your batter into a pipping bag
  6. Line your muffin tray with cupcake liners. Snip a slightly bigger opening on the pipping bag 
  7. Pipe the mixture into the liners. Sprinkle the top with a generous amount of crumble toppings.
  8. Bake the muffins for 20 ~ 22 mins


Friday, May 30, 2014

Chocolate Chiffon-Sponge cupcakes

No idea what I am talking about? You should just try this recipe! It was something that came by pure luck yet it has the texture and taste that I really like (so do Prince Charming!)

If you are looking for a cake that has a texture in between Chiffon and Sponge, this will be the right one for you :) Perfect texture for a cupcake! Not greasy - Light and spongy and fluffy :)


To make this:

95g of cake flour
75g egg yolks
70g brown sugar
60ml Oil
10g Cocoa powder (I used bittersweet kind)
4 tbsp water 
3 tbsp fresh milk

130g egg whites
80g brown sugar

  1. In a mixing bowl, combine yolks, sugar, oil. Add in flour, water, milk and cocoa powder. Mix well. Ensure that the batter is not lumpy to avoid affecting the texture. If the batter appears to be too thick, you can add in more milk to get a slightly runny mixture (not too runny - Mixture should form a ribbon trail)
  2. Preheat oven to 170°C
  3. In a separate bowl, beat egg whites till foamy then add in sugar gradually till peaks achieved. Note: Do not overheat egg whites. This might causes collapse of the cake
  4. Add half of the egg white mixture (meringue) into the yolk-flour mixture. Fold well. Add in the remaining egg white mixture into the cake batter. Ensure that you fold well.
  5. Pour your ready batter into little cupcake liners and bake for 35 mins

Sunday, May 25, 2014

All natural Purple Chiffon cake

Finally managed to get some purple sweet potatoes! Was looking up and down the whole of Singapore for them and just when I was about to drop the idea, I found it at Finest Supermarket! Wheeeeee....

And so..  I baked the ALL NATURAL PURPLE CHIFFON CAKE! All natural because no added colouring! The purple colour comes from the sweet potatoes! Love the colours so much! Baby Kwok #1 enjoyed this snack and gobbled one up within minutes. I made them into small cupcakes for him and Baby Kwok #2. The little princess love them too but because she's only 10+ months old, I do not want to expose her to that much sugar (seems okay to us but a lot to infants). Anyway, it is quite a healthy snack for the adults so do give it a try!

Love the colour! 

Baby Kwok #1 enjoying his tea break :) 
He is a cake person like me!!

To make this, you'll need:

- 85g Cake flour
- 50g/ml Oil
- 3 Egg yolks
- 20g Sugar
- 3 Tbsp water

- 4 Egg whites
- 50g Sugar

- 100g mashed Purple sweet potatoes
- 3 Tbsp milk ( I replaced it with infant formula milk as I am giving as a snack to Baby Kwok #2)
- Some diced Purple sweet potatoes

  1. In a bowl, mix yolks, sugar and oil. Combine well.
  2. In another bowl, combine the mashed sweet potatoes and milk. Add this mixture into the yolk mixture in step 1
  3. Add the water and cake flour into the mixture from step 2. Set aside. Meanwhile, preheat oven to 180°C
  4. In a large mixing bowl, beat the egg whites till foamy. Add in the sugar gradually till you obtained a glossy meringue with peaks.
  5. Take half of the meringue and fold into the cake batter from Step 3. Add the remaining meringue into the batter and fold well.
  6. Pour the batter into a chiffon pan or cake pan. Tap to release air/gas trapped in the batter before baking. Bake for 30 mins.

Basic Macaron shell recipe

I have people who sent me numerous private messages in Facebook for the recipe that I am currently using for my macarons. I can't say this is the perfect recipe for everyone but it does work well for me (At least, I get feets on my macrons after so many attempts).

Also, this recipe is less sweet as compared to many recipes on the Internet. The ratio between the icing sugar and almond meal is almost 1:1 which makes it acceptable. Most of the recipes that I have googled online were in the ratio of 1:2 (Almond vs Icing) and the sweetness is far from what I can accept - No doubt macarons were meant to be sweet.

Anyway, I am still constantly looking out for other recipes to try out before I can conclude which is the right and perfect macaron recipe. So till then, I'll post the current one that I like at the moment.


To make these macarons, you will need:

- 30g Egg whites
- 30g Caster sugar

- 35g Icing sugar
- 30g Almond meal


  1. In a mixing bowl, beat the egg whites till foamy. Add in 1/2 of the caster sugar and continue to beat. Gradually add the remaining sugar until you have peaks. This is called Meringue. Your meringue should be glossy and have define peaks when you lift your mixer up. 
  2. Sift your Almond meal and icing sugar in another separate bowl. Ensure that you get very fine mixture almost like a flour. This determines the texture of your macarons. If your almond sugar mixture is not as fine, your macarons will have rough surfaces.
  3. Add your meringue to the almond sugar mixture and blend well. When the meringue and almond mixture get incorporate well, press the batter down and then scoop up for a few times. This is known as Macaronage - the step that determines if your macarons will have feet or not. The consistency of your mixture should be like a lava texture. (Never seen lava? Just lift your spatula and see how the mixture drop down. You should see a ribbon trail when the mixture drops from your spatula. 
  4. Pour the ready batter into a piping bag. Pipe the batter into little round shapes. Tap to release the air bubbles and leave to dry for about 20-30mins. 
  5. Meanwhile, preheat your oven to 170°C for 5 mins then turning down to 150°C.
  6. Bake for 15 mins and leave to cool
For the fillings, you can use jam, nutella or self made some buttercream to assemble the macrons!
Have fun making these little french cookies!


Saturday, May 24, 2014

Pastel colored Macarons

I baked Macarons AGAIN! Hahaha!!! I am just hooked into baking these delicate little french cookies. There is no way to describe the happiness when you see the feet appearing on them. It's like.... you were running for a marathon thinking you might just give up halfway and the next moment you realised you have reached the finishing line. Bad description but well you know what I am trying to explain.

Baby Kwok #2 birthday party will be approaching soon and we have set a Little Pony theme for the party. The first thing that comes to mind about Little Pony - Rainbow, Pastel, colourful. I am getting so excited about decorating for the party as well as setting up a candy bar. When you have a girl, you get to do more things! (Oh well, I mean comparing to preparing a boy's party vs a girl's party, it makes a huge difference)

So.. here I present my pastel coloured macarons! Happy with the result but not what I was looking for so that means more posts on macarons soon! :P

Pastel coloured Macarons
(A combination of Pink, Blue and Yellow)

Prince Charming requested for a light dinner so we decided to have wraps. The requester did not make any comments after his dinner so I guessed that equals to "Not so nice" LOL! He only questioned about the marinate of the chicken fillet which I used as a filling. Hmm.. I think he hates that filling. Opps...

Our dinner! 
Chicken fillet wraps with Romaine salad and chips

Friday, May 23, 2014

Rainbow Chiffon cake

I baked a rainbow! The recent trend of baking anything rainbow has caught me!
Been so obsessed with baking colorful stuffs lately ;) Was thinking of attempting to bake Rainbow-ed macarons but because I wasn't that confident with my macaron skills thus decided to put it on pause (Till I perfect my macarons then). And then, I was amazed with the Rainbow cakes that I saw on Pinterest and on the Internet  (e.g. Martha Stewart, Kerry Cooks and Pixelated Crumb), I almost wanted to bake one  for Baby Kwok #1's 4th Birthday! Oh well, but the boy requested for a Transformers cake (hmpf!) so I dropped that idea.

With the recent leg issue that I faced with Baby Kwok #1, I was a little down. Even though, the Orthopedist has mentioned that his leg seems okay as she did not observed any pain when the cast was removed and he could stand and squat, I am still worried. After the cast removal, Baby Kwok #1 is still limping :( The way he walk is worrying me. I googled and results were showing that it is pretty normal that the child may be reluctant to walk or walk weirdly during the 1st few days (or even week) after going off the cast but it still depressing. I get so stressed when I see the boy limping and get fed up by asking him what's wrong! I think that scares him a little. Sigh... Prince Charming said I am overly paranoid but seriously, WHO wouldn't be worried?! I appreciate some kind advise from parents who have similar experiences so please do send me a comment!
 
Anyway, decided to bake a Rainbow Chiffon to make myself feel better. Colors perks me up!


To make this, you will need:

Cake batter
  • 80g Flour
  • 60g Vegetable oil
  • 60ml Water
  • 20g Sugar (I used caster sugar)
  • 70g Egg yolks

Meringue
  • 180g Egg whites
  • 90g Sugar
  • 10g Corn starch

  1. In a mixing bowl, combine yolks, sugar and oil. Mixed well
  2. Add flour and water to the yolk mixture. Mix and ensure that the batter is lump free. (Lumps affects the texture of the cake)
  3. Divide the mixture into 4 bowls (more if you are doing more colors). Meanwhile, preheat your oven to 170°C
  4. In a separate mixing bowl, beat egg whites till foamy. Add in sugar and corn starch gradually till mixture get transformed into peaks. Do not over beat the mixture - You can check the consistency on and off to ensure you get the right texture. Meringue with soft peaks works well but I prefers a slightly solid peak but not to the extend of very stiff peaks.
  5. Scoop the meringue into the cake batter mixture (step 3) equally. Add your desired color gel to the individual bowl. Fold and blend the meringue into the cake batter gently. (Do not over-fold as this might causes the chiffon to collapse)
  6. Layer the mixture into the chiffon pan. Once done, tap the chiffon pan to release air bubbles/gas in the mixture. Bake for 33~35 mins.

Sunday, May 18, 2014

Nutless Macarons + Happy 4th Birthday Little Claire!

Attempted macarons again and this time round, it is a nut-less version. You're not seeing wrongly, yes NUT-LESS! No almonds! I wouldn't say the recipe is a big success because I felt that it tasted a little heavy comparing to usual macarons. Sesame has this strong flavour that is too overpowering I suppose. Guess I need to tweet the ratio of the sesame and icing sugar to perfect this recipe.

Black sesame Macarons (Nut-less)


It is my little niece's Claire 4th birthday celebration today! We went over to my sis's place for a mini celebration for the pretty little "Elsa" in disguise LOL! The girls are so crazy over Frozen that they requested a Frozen themed party!

Happy Birthday Claire!


Been trying my best to bake/cook more so that I get to post more. Shall take it easy and do things slowly because it is really not easy managing 2 kids. Baby Kwok #2 is now at the crawling, standing unassisted mode 24/7. She used to be okay with sitting inside the Jumperoo or walker, but now that she is so mobile, she prefers to be on the floor crawling away or be carried by us. Pretty tiring for Prince Charming and myself!

It is even worst when she is at teething stage because she practically do not sleep during the night and would fuss and be cranky. She only has 5 teeth at the moment so I cannot imagine the road down when she starts popping more teeth.

Baby Kwok #1 fractured his left ankle last Friday :( He fell from the school's chair and hit against one of the table resulting in the hairline crack on the ankle bone. Went KK Hospital and was put on a soft cast. Was told not to let him walk until we attend the follow up review this coming Tuesday. I am really praying hard that the review will be a good one and he can remove his cast and be active again. It is really upset when you hear your child asking you "Mummy, is my leg okay?" Please pray for me that the review with the Orthopedist will be a good one!!!

Sunday, April 27, 2014

I'm still alive!!!

Oh my! Can't believe that I have left my blog vacant for almost 7+ months! The last time I have posted something was back in Sept 2013. I do really need to find time to publish more posts here!!!!


Though I have not been updating my blog, I do bake and cook on and off. Just that I am plain lazy to  sign in to blogger and start the publishing EVEN THOUGH my heart tells me that I should just go ahead and write a post but my brain just would not listen :(

Finally had the chance to update my post- All thanks to the Prince Charming who has left to run for a marathon and my Baby Kwok #2 is up and roaming around!

Here's what I did for our dinner on 4/26/2014. I attempted Macarons again and they finally had broad feet that I was looking out for! Yay!

Broad feet Macarons! 
It was a dark pink btw, filter of my camera phone makes it look brownish 


Then, I fixed a easy simple western dinner for both of us.  Not too hard and really quick to make them and Prince Charming enjoyed his dinner so do I (even though it was not that full for us but we need to go light on our weighing scale)

Prince Charming's dinner.
Cheese sausage with baguette, Japanese corn and sunny side up

My dinner!
Blueberry bagel with corn and cheese sausage

Baby Kwok #1 and #2 had other food for dinner though. Baby Kwok #1 is not as adventurous with food and he usually prefers asian cuisine to western cuisine so when it comes to main meals (lunch, dinner) his request will always be - RICE, RICE, RICE. Baby Kwok #2 is only 9.5 months old so we are still very conserve with the food that we offers to her (although I have to admit that we are more chincai (easy-going) comparing to the time during Baby Kwok #1 - Middle child syndrome LOL!)

And.. I have not been publishing "professional studio" kind of pictures on my blog because Prince Charming has not been playing with his toy for quite sometime. Should I be taking up some lessons with him to learn how to capture pictures so that I can do it myself? Should I?? 


Monday, September 16, 2013

Bonchon Chicken

My parents went on a short holiday to Bangkok and thus here I am whipping dinner for the entire family! Decided to attempt on doing the famous Bonchon Chicken since it is so crazy expensive in Singapore and only a few Korean restuarants does them.

It was not as hard as I thought it would be but.. it sure takes up a portion of time.
I referenced Maangchi recipe but did some changes here and there. It was so hit with my family! My sister who is not so into cooking even asked me for the recipe to try out! :)


Here's my version:

  • 1 Packet of Drumlets (I bought the regular size and not the mini ones)
  • 1 Egg
  • A splash of Garlic & Onion seasoning
  • 500ml of milk (Or sufficient enough to cover all the drumlets)
  • Salt
  • Pepper
  • Half packet of Korean frying mix
  • Oil for deep frying

For the Hot sauce
  • 4 tbsp of Gochujang (Red Pepper paste)
  • 2 tbsp Brown sugar
  • 1 tbsp Blueberry vinegar

  1. Washed the drumlets and soaked them in milk (adding the garlic and onion seasoning to the mixture). Fridge them for at least 2hrs
  2. Drain off the milk and marinate the drumlets with salt and pepper. Crack an egg and mix throughougly. Set aside for about 15 mins so that the drumlets can "eat in" the marinate
  3. Transfer the drumlets over to a big mixing bowl and mixed in the Korean frying mix.
  4.  Mix well and set aside.
  5. In a deep wok, bring the oil to heat till bubbles appears. Dip the drumlets into the hot oil and fry till slight golden brown.
  6. Re-fry the drumlets again till it turns golden and crispy. Drain the drumlets well to avoid greasiness.
  7. In a saucepan, add in all the hot sauce ingredients and bring to boil. Mix in the deep-fried drumlets and you are ready to serve.
You may also sprinkle roasted crushed peanuts and sesame over the drumlets.
Hope you like it! :)

Saturday, April 27, 2013

Our Renovation progress

Finally, finally I'm able to spare some time to blog over at my little world here :) Been busy with work, been busy with both Baby Kwok and Baby #2.

 Just some recent updates: Have been staying at my parents' place since January this year as we've sold off our apartment and the new owner would not let us extend 2 more weeks and even asked us to move out earlier :(

Sigh.. everything just seems to be in a rush. Packing our stuffs and moving them to the storage warehouse, clearing the old furniture etc etc.. And finally our long awaited day for key collection came and without losing any much more time, we started with the renovation the day after we obtained the keys. My dad as usual is the big helper behind our renovations just like how he did it for our 1st apartment. Without him, I believed we might still be looking at the blank walls and rooms now :P It has been a busy 1.5 months and our renovation is finally 95% complete at the moment!

From ugly walls and floorings, we can now beam with joy when we looked at how the renovation has progressed now. Prince Charming and myself are really satisfied with our renovation and I really really owe a lot to my daddy. We only told him the design and concept and he helped to make arrangements for each and individual part of the reno. Without him helping us, I don't think we are even at 10% of the progress.

 Another big help is Taobao! We bought quite a number of ornaments and lightings from Taobao at really cheap price and the quality were really good! I wouldn't say its posh quality but at the price we are paying, it's really worth the penny. We even saw the same lighting in one of the shop here in Singapore and they were selling it at 300% of the price we paid!

Really LOVE LOVE LOVE my apartment so much! Can't wait to move in!!! Will post pictures up when its 100% complete :) I promise!

Monday, March 11, 2013

Hello Hello!!!

Can't believe it's another long hiatus from me :(
Haven't been blogging since I've been really busy.

It has been a challenging year for me in 2012 I have to say.
Now that it's 2013, guess I really need to re-cap what has happen in 2012 and what has been coming up in 2013 :)

Oct 2012

  1. Left my previous company where I've sloughed hard like a buffalo for 2 years
  2. Suffered from bloated-ness for a whole month and was suspecting something serious :(
  3. Sold my 4-rm and upgraded to EA
Nov 2012
  1. Joined my current company and really loving it :) Met nice colleagues and have a great boss who appreicates and understand my needs for Work-Life balance as she understands that I'm a mother and needs to be there for Baby Kwok
  2. Found out about my pregnancy only after a month into the job! The bloated-ness was one of the pregnancy symptoms :P
Dec 2012
  1. Travelled to Scotland for business trip with Prince Charming and little bun in my oven ;)
  2. First separation from Baby Kwok for 2 weeks and  was so upset that I cried EVERYDAY
Jan 2013
  1.  HDB completion done for the selling of my 4rm and moving out from our 1st home and back to my parents place
Feb 2013
  1. Went back to Taipei with Prince Charming, Baby Kwok and little bun bun in my oven for CNY
  2. Had my 2nd trimester screening and knowing the gender of little bun bun! We're having a princess for #2!
Mar 2013
  1. HDB completion for the purchase of my EA!!! Yay!
  2. Went for tiles selection and had the flooring measurement done for our parquet :)
 I have to say 2012 was challenging with me facing with a new job and having to know about my pregnancy. 2013 has been good so far and I'm sure it will be even better upon the arriving of my #2 in July! We're be a family of 4 soon! Yipeeee~

Thursday, August 16, 2012

8 months?!?!?!

I cannot believe that I have not blogged a single entry for almost 8 months :(
Miss the cooking, baking and photographing! Sigh..

I........DESPERATELY........NEED...........A............NEW..........JOB...........