Monday, December 03, 2007

Raisins Sprial Roll & Oreo Butter Cake


Makes 8" Cake Pan

IngredientsAmounts
Cake flour225g
Baking powder1 Tsp
Baking soda1/2 Tsp
Salt1/2 Tsp
Butter85g
Sugar150g
Eggs, beaten2
Yogurt240ml
Vanilla Essence1 Tsp
Oreo cookies1 packet


  1. In a bowl, sift all the dry ingredients together.

  2. Cream the butter and sugar together. When well blended, add in the eggs slowly and ensure that the mixture is well mixed.

  3. Fold in 1/2 of the flour mixture into the butter mixture. Add in 1/2 of the yogurt and fold in another 1/2 of the remaining flour mixture. Add in the last amount of yogurt and Vanilla essence. Combine well and fold in the last amount of flour. Blend well.

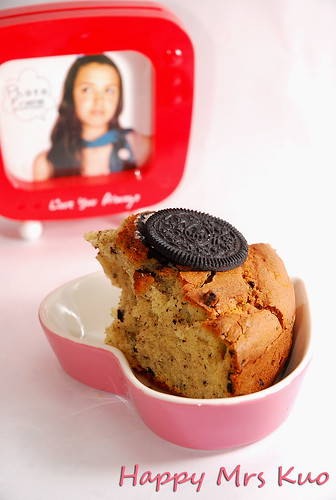
  4. Take a portion of the oreo cookies and crushed them using a roller pin. Pour the crushed cookies into the batter and blend well. Pour the ready batter into the cake pan and garnish by placing a few of the whole Oreo cookies on top.

  5. Bring to bake at 180 degree Celsius for 35 ~ 40 mins.
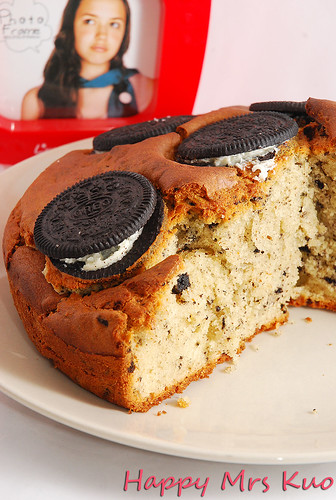


Verdict from the Royal Prince Charming: Soft and nice!

My Prince Charming was amazed by the crispy skin of the cake and the fluffiness. He was just in time when I got this cake freshly out from the oven. He couldn't even wait and wanted to eat that right away. I stopped him of course, because my mum always remind me never to eat anything that is just cooked pipping hot because it is very heaty for the body. My Prince Charming has this bad habits of being impatient when it comes to food. :P

This recipe is adopted from Angie of My Kitchen, My Laboratory.
I missed her bloggings :'(



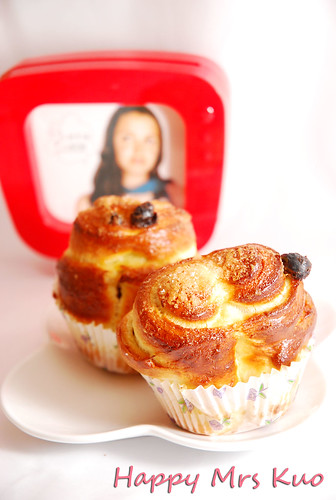
Makes 6 Spiral Raisin Buns

IngredientsAmounts
Cake flour250g
Icing sugar40g
Salt1/2 Tsp
Water90ml
Egg1
Instant Yeast1 1/2 Tsp
Butter40g


Additional:


  • Egg Wash
  • Raisins
  • Sugar
  1. Combine cake flour, icing sugar and salt together in a bowl.

  2. Add in water, egg and instant yeast and continue to mix into a dough.

  3. Once the dough is formed, add in the butter and blend into a smooth and shiny dough.

  4. Place the dough in a bowl and cover with plastic wrap. Allow proofing of 60 mins or when double in bulk.

  5. Punch the air out and knead the dough. Cut the dough into small portions. Roll each portions into oval shape.

  6. Brush the oval shaped dough with egg wash and spread the raisins on top. Sprinkle some sugars and roll up like a swiss roll.

  7. Make a cut in the center of the rolled dough and open it up to form the spiral shape.

  8. Brush the dough with some egg wash and sprinkle some more sugar on top.

  9. Allow the dough to proof for another 45 mins.

  10. Bring to bake at 180 degree Celsius for 20 mins.
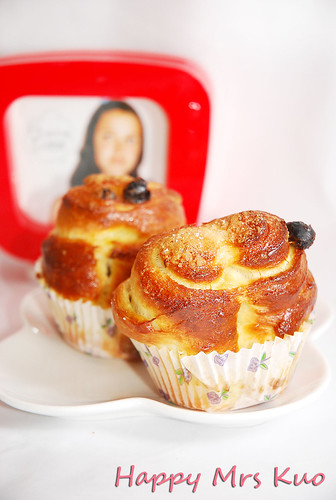


Strange enough, no cinnamons or nutmeg were added to this bread. However, my Royal Prince Charming commented that he could taste a tint of either one of the spice in the bread >.<

I was inspired by Lee Lee's Mocking sting bees Bread, thus decided to try a hand on it.
Anyway, I did some modifications to the shape of the bread and omitted the milk powder. I prefer something petite and cute :)

*Updates: I gobbled these breads this morning and realised that the skin of the bread can get hard if it's left overnight but amazing part is, its more to the crispy kind of hardness and the inside of the bread is still soft and chewy. I will definitely try this again :D*

Sunday, December 02, 2007

Plain Puffs


Makes 15 Puffs

IngredientsAmounts
Butter150g
Water150g
Cake flour150g
Baking powder12g
Egg230g ( 4 eggs)
  1. In a small pot, bring butter and water to cook on low heat.

  2. When the mixture starts to boil, sift in the flour and baking powder. Stir the mixture to make sure that the dry ingredients are well blended with the liquid mixture.

  3. Remove the pot from the heat and add in the eggs slowly. Blend the batter fully.

  4. Scoop the batter into a pastry bag. Squeeze the batter in spiral shape onto a grease-proof paper.

  5. Bring to bake at 180 degree Celsius for 25 ~ 30 mins or when puff is golden brown.


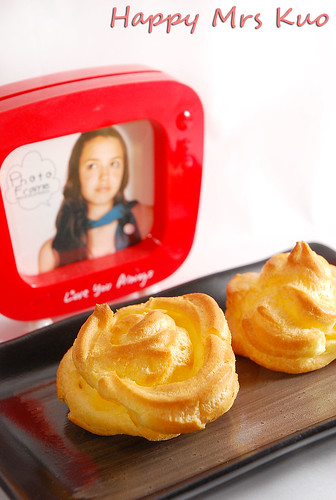
Baked these plain puffs for our snack today. The puffs should be filled with custard cream but I omitted that because we have been stuffing ourselves with too much sugar recently. It's time to reduce our sugar intake. I seriously need to start my crunches session again. It's like I've been eating too much ever since I started my baking obsessions.

As usual, the occasionally Fussy-eater, my Royal Prince Charming nagged at me for not giving him any Custard cream. He was yearning for something sweet and begged me to make some fillings. Well, the kitchen is already sparking after I cleaned it up and so, I won't tired myself out to dirty it again. However, not to disappoint my Prince Charming, I topped his puffs with some icing sugar. He had no choice but to ate that. Anyway, he find it quite tasty with the icing sugars.

This recipe came from the book "新手成功烘培DIY" which my mother-in-law bought for me in Taiwan. By the way, my mother-in-law is a taiwanese so most of the time, the things she bought for me are all from Taiwan.

Saturday, December 01, 2007

Korean Bibimbap and kimchi soup


Makes 2 Bowls

IngredientsAmounts
Cooked rice2 bowls
Carrot1
CucumberHalf
Chicken Thighs2 pieces
Mushrooms5 ~ 6
Big green onions1
Bean sprouts1 handful
Gochujang Paste2 Tbsp
Sugar2 Tbsp
Vinegar1 Dash
Water1 Tbsp


Optional: Sunny side up


  1. Boil a pot of water and bring the chicken thigh to cook over medium heat. Remove the chicken when fully cooked and soaked it in a pot of water for 5 mins. Shred the chicken.

  2. In another pot, bring water to boil. One at a time, blanch the shredded carrots, cucumbers, bean sprouts and mushrooms. Drain and set aside for cooling.

  3. Scoop the Gochujang paste and mixed it with sugar, vinegar and water.

  4. In a deep bowl, put in the cooked rice and arrange the shredded chicken, cucumbers, carrots, mushrooms and bean sprouts on top of the rice. Place the sunny side up in the middle of the arrangments.

  5. Add the ready mixed gochujang sauce on top of the egg and serve.


Makes 1 Pot

IngredientsAmounts
Water3 big bowls
Carrot1
Fresh fish fillets2
Kimchi Own preference

Green Onions

*Used the remaining for Bibimbap*


Seasoning: Sesame Oil, Salt, Soy Sauce, Chilli Powder


  1. Bring the water to boil. Add in the carrots and onions.

  2. Cut the fish fillets into small pieces and marinate with the usual seasoning like salt, peper and sesame oil. Set aside.

  3. When the combination in step 1 starts to boil, add in the kimchi.

  4. Turn the heat to low and allow to stew for 2~ 3 mins.

  5. Add in the marinate fish fillets and close the lid for further cooking.

  6. When the soup starts to boil, add in the chilli powder, some salt and soy sauce for taste.

  7. Allow another stewing of 2 mins on low heat. Serve


Both my Prince Charming and me love Korean cuisine alot, especially the stone grilled Bibimbap. I chanced upon this website that has many amazing and easy recipes for Korean cooking. I was eager to try all the recipes because they looked so delicious!

Anyway, I also visited this website " My Korean Kitchen" and found the recipe for the above Bibimbap sauce. I really like bibimbap so I told myself that I must defintely make this dish on our table today. LOL.

The recipe requires Gochujang paste which is actually Hot pepper paste. It can be found in OG Orchard and Carrefour. The paste taste abit like miso sauce in fact. I wonder if my taste buds were playing a prank on me because it was'nt spicy at all. Anyway, the sauce was so marvellous that we even licked our bowl after finishing the big portion of Bibimbap. I can say this is an easy and healthy meal, but you definitely need to spent some time shredding the vegetables like what I did. I started the preparation for like as early as 3pm and ended up finished cooking at 430pm. That equals to a total of 1 hr 30 mins for shredding and cooking both the Bibimbap and soup. I think I need to be faster.

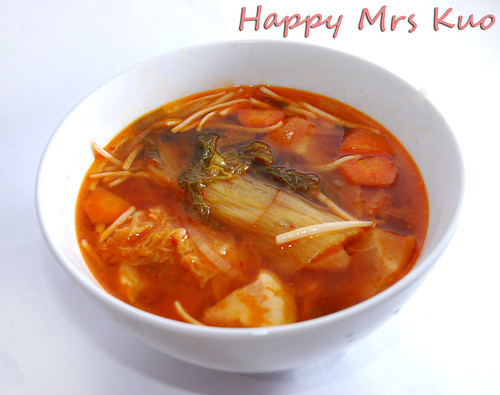
The kimchi soup was nice too. It's good for cold weather! After drinking it, Prince Charming and I perspired so much that we had to take another shower even though we just had one earlier before our dinner starts. The kimchi added a tint of sourish taste to the soup and thus, it makes one's appetite increase. LOL. I think that's the reason why I could actually finished up my whole pot of rice!

I'm so in the mood for Christmas! My Christmas tree is finally up after the tedious setup yesterday night. We just need a couple of oraments to hang up onto the tree. I love CHRISTMAS!


Sausage Rib Bread


Makes 1 loaf

IngredientsAmounts
Bread Flour200g
Cake Flour40g
Sugar35g
Salt¼ Tsp
Instant dry yeast2g
Cold Water70g
Mashed Potatoes30g
Butter15g

Fillings: Jumbo Chicken Sausage from Carrefour
Brushing: Beaten egg and Ketchup

  1. Combine the flour, salt, sugar, yeast, potatoes and water in a bowl. With the help of a mixer, hook the mixture on low speed. When a dough is formed, turbo the speed to Medium and continue hooking till dough is smooth and shiny.

  2. Add in the butter and adjust the speed to slow. When butter is combined with the dough, turn it back to Medium speed once again. You should get a smooth dough.

  3. Allow the dough to proof for 80 mins.

  4. Once proofed, punch out the air within the dough and let rest for another 10 mins.

  5. Cut the dough into 4 equal portions. Roll the individual portion into an oval shape. Place the hotdog on top of the dough and start to roll the dough up. The hotdog should be covered by the dough.

  6. Cut the wrapped dough into small slice and twist to form the rib-like shape. Allow another proofing of 25 mins.

  7. Once ready, brush the top with some beaten egg and ketchup. This will add shine and an additional flavour to the ready result.

  8. Bring to bake at 180 degree Celsius for 18 mins.


These Sausage Rib breads were supper for my Royal Prince Charming. He was yearning for supper at 10+pm and I got that sixth intuition that he's gonna cook a bowl of Instant noodles. I don't like the idea that he is taking MSG product at such hour, because firstly, MSG is no good for health and the salt content is far too high. Secondly, Prince charming always love to add in many "side ingredients" into his noodles. For example, he can add up to 4-5 items for his noodles and they can range from Luncheon meat to Dice chicken and he's complaining that he is putting on too much weight.

Anyway, I was planning to bake some bread for breakfast tomorrow so it became a killing 2 birds with one stone plan. I get breakfast done and a healthier supper for my Prince Charming.
Flipped through my recipe book and found this. It's so far the shortest time required recipe that I've come across. I need to get the bread done before my Prince Charming comes nagging at me again. Nag for food as usual. LOL.

By the way, I did some really really big mistakes. I think I'm just too tired. The recipe actually required an egg yolk for the dough but I forgotten to add it, also it was supposed to proof for 80 mins but I forgotten all about it when my timer alerts me when it's 60 mins. Thus, the dough was only proofed for 60 + 25 mins instead of the 80 + 25 mins. What's going on! I think I can't really do too many things at the same period of time.

I was helping out my Prince charming with our newly bought Christmas tree. Next, I was hanging the clothes, and next I was washing up the dishes and next I was vacuuming the floor and next I was cleaning the kitchen and next I proofed my dough for only 60 mins!!! What's going on! I guess, I can't really multi-task. Tsk tsk.

Wednesday, November 28, 2007

Seaweed Pork Floss Loaf


Makes 1 loaf

IngredientsAmounts
Bread Flour200g
Salt¼ Tsp
Sugar10g
Plain Yogurt35g
Instant dry yeast2g
Water80g
Butter15g

Filling: Seaweed Pork Floss

  1. In a bowl, combine all the ingredients together exception of the butter. With the help of a mixer, hook the mixture using low speed. When dough is formed, change the speed to medium.

  2. When the dough is no longer lumpy, add in the butter and continuing hooking. As step 1, hook using low speed and changed to medium speed when dough is smooth and shiny. Hooking should takes about 20-30 mins, depending on individual mixer force and speed.

  3. When dough is finally ready, allow to proof for 80 mins. Remember to place the dough in another bowl and cover with plastic wrap.

  4. When the dough has proofed, it should increase double in size. Roll the dough into a big round ball and allow it to rest for another 15 mins.

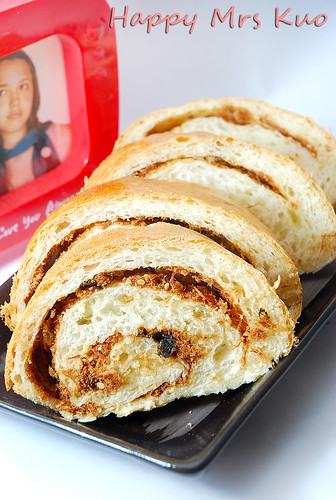
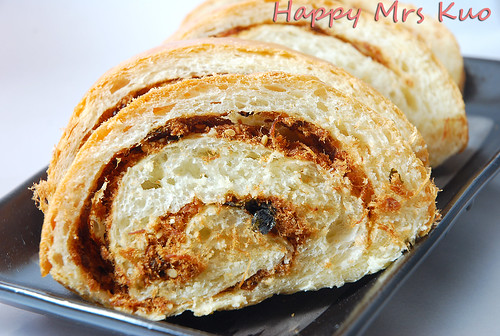
  5. Next, roll the dough into a rectangular shape. Apply the seaweed pork floss onto the dough evenly. Once done, roll up the dough like the way a swissroll does. Allow the dough to go through another round of proofing for 60 mins.

  6. Coat the dough with beaten egg and bring to bake at 180 degree Celsius for 30 mins.


I have always like the Pork floss buns that can be found in many of the bakeries. However, whenever I recall the amount of butter or mayonnaise that is being applied to it, I got this feeling that a big pile of weight just got clinged onto me. Being a very "bready" person, I can go on 3 meals with just bread, jam and peanut butter. I can even choose bread over a sumptuous meal and my parents could never understand why. Well, neither do I :P

Was flipping through my bread recipe "孟老師的100道麵包" as usual and saw this Pork Floss recipe. Browse through the ingredients and realised that very little or in fact, you can replace the butter with healthier choice like Canola or Olive Oil. It's less fattening, I assume.

The result was good except for the part that I could have done better was the rolling procedure. I guessed if I were to roll the dough tighter, then some part of the bread would not have come loose when I sliced down. Nevertheless, I will nominate this bread to be my every weekend breakfast! It's fast and tasty and soft and fluffy! I'm running out of descriptions but I'm sure you guys will love it! Bon appetit!

Oh, by the way, my seaweed pork floss flew all the way from Taiwan! A complimentary from my Mother in law! LOL! It's surely taste much better than the pork floss we get here.