Showing posts with label Japanese. Show all posts

Thursday, January 01, 2015

Beard Papa's style Cream Puffs

On the very last day of 2014, apart from spending quality time with Baby Kwok #1 ( Opps.. Baby Kwok #2 was with her babysitter) I actually did something that was not intended to!

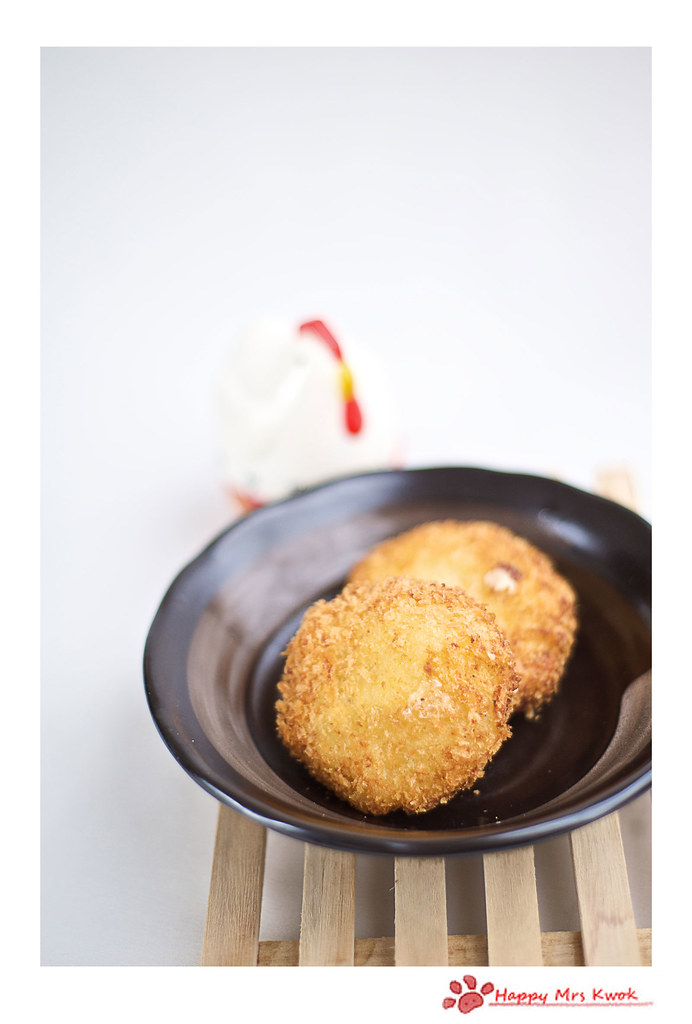
I.....Made....Beard Papa's style.....CREAM PUFFS!
Prince Charming and Baby Kwok #1 are both fans for Beard Papa's cream puff mainly because of the cookie dough shells. They are pretty expensive in my opinion - $2.50 for a normal custard filling and $3.80 for a speciality flavour (e.g. Durian)

With a cost for about 5 pieces of Beard Papa's puffs, I easily made about 11 puffs which means its almost 50% savings! Cheapo mummy on the run! LOL!

Anyway, I was really happy with the puffs because my family enjoyed them and I get good reviews on how it looked like the ones from Beard Papa! Something to make the last day of my 2014 so worthwhile!


Note: Custard cream and Cookie Dough should be made in advance before you start preparing for the shells.

To make these, you will need:

Shells
- 120g Butter
- 3/4 cups of Water (Approx. 170ml)
- 1 tsp Salt
- 1 tsp sugar
- 1 1/3 cups of Sifted Flour (Approx. 190-200g) 
- 5 Eggs (Mine is about 58g each)

1. In a pot, add water, butter, salt and sugar. Bring to boil and ensure that the butter are distributively
    melted.

2. Remove from heat and add the flour into the mixture. Stir well and ensure that the batter is lump 
     free. Put onto the stove to further cook. Cook for approx. 2 mins.

3. Stir well and let the steam go off from the mixture before adding in the eggs. Remember to add 1
     egg at at time so that the mixture corporates well.

4. Pour the mixture into a piping bag and pipe onto a tray lined with baking paper. Add the Cookie 
     dough over the mixture. 

5.  Bake for 22-25 mins or until puffs are raised nicely and golden.


Cookie Dough
- 30g Butter
- 1/3 Cup Icing Sugar (Approx. 50g)
- 1/3 cup Plain flour (Approx. 50g)
- 1 tsp Baking Powder
- 2 Tbsp Veg oil (Optional)

1. Melt the butter in a sauce pan.
2. Combine the dry ingredients into the melted butter and mix well till it forms a dough.
3. Keep the dough in a ziplock bag for later use.

Tips: If you realised that your cookie dough is dry just before applying to the shell mixture, add in 2 tbsp of Veg oil and combine well with the dough. 


Custard Cream
- 3 Cups Full cream milk
- 1/2 Cup of Flour (Approx. 70-80g)
- 1/2 Cup of Sugar ( Approx. 110-115g)
- 4 Egg Yolks
- 30g Butter
- 1 tsp Vanilla Extract
- 1 Cup of Whipped Fresh cream

1. Beat the yolks with about 50ml of the milk.

2. In a separate bowl, combine the flour with the sugar. Add the yolk mixture to it.

3. Mix well and add in the remaining milk.

4. Cook over stove on medium heat till the mixture get thicken. You should be able to see ribbon
    trails when you stir the mixture. It should look like a normal custard cream but slightly thicker. The
    thick consistency will ensure that the custard filling will not flow out from the shells while pipping.

5.  Add in the butter and vanilla extract and stir well. 

6. Cover with a cling wrap touching the surface of the mixture. This will prevent a thin film from 
    forming on the surface while cooling.

7. Before pipping, mix the fresh whipped cream into the custard cream. The texture would be like of 
    a thick melted ice-cream. It pretty taste like Ice-cream too :)


To assemble:

1. Ensure that your shells are fully cooled before you start pipping the custard filling

2. You can use a toothpick to poke a small opening at the sides of the puffs OR if you find that a 
     hassle like how I feel (actually I am just being lazy), simply use a long pipping tip to create a   
     opening while pipping the cream.

3. Dust the cream puffs with icing sugar before serving OR you can choose to serve them cold. I
    popped my puffs into the freezer for about 3 hours and they tasted like ice-cream puffs! 


To end this post, I like to wish all my readers a HAPPY 2015! May 2015 be a better and fulfilling year for all of us and till then, may I be blessed with more baking posts (If the little ones allow). Hahaha!

Saturday, December 31, 2011

Happy New Year!

Wooooo.. in another 3 hours it'll be 2012! Time flies doesn't it?
Everything seems to running in the fast forward mode ever since I stepped into Motherhood! It's awesome on one hand but terrible on the other hand because it just make me feel guilty that I've not done many things that I targeted to have them done so in 2011!!!!

  • I wanted to bake Mango and Strawberry swissrolls
  • I wanted to make Crumble Apple Pies
  • I wanted to designs some cupcakes
  • I wanted to bake some croissants
  • I wanted to put my hands on painting
  • I wanted to learn sewing
  • I wanted to go on a diet
  • I wanted to conduct a mini baking sessions with my friends
  • I wanted to do some Art and Crafts and Baking session with Baby Kwok
  • I wanted to have photography lessons tutored by Prince Charming
These are just a few of my To-do list for 2011! For godsake, none have been fulfilled :(
Does that means I have to try to have them done in 2012? Guess I'll have to do that then~

Anyway, there's one thing that I did eventually fulfill for my To-do list which is to learn Korean Language! Have been checking on a few schools and finally decided on one. Have not done the registration yet but more or less confirming myself for their Jan's intake :) Apart from that, I'm pretty proud of Baby Kwok as he is getting himself comfortable with school finally. However, he seems to lost some weight after going to school. Sigh.... When will my Baby Kwok be Chubby Kwok? So thus, my 2012 MUST-DO list will be to plump up my Baby Kwok and his Papa (Prince Charming), making both of them very healthy and chubby :)

2011 have been quite a good year for me. I wouldn't say its fantastic but it is not that bad either. I managed to survive in a new job with  nice colleagues and also making myself comfortable being a mother, wife, daughter, daughter-in-law and grand-daughter. It was really a challenge in 2010 when I was promoted to being a mum but I'm really happy with this promotion! Even though I may not be the most perfect mum in the world but I know I'm the best mum to my Baby Kwok :D

In 2012, I hope that all of my love ones will be blessed with great health and happiness. For all the children, especially Baby Kwok and his cousins - May all of them be healthy and happy. For my parents/grand mum and in law/grand in law - May them be blessed with great health, wealth and happiness. For myself, Prince Charming and my siblings/cousins - May all of them be happy in all areas (Career, luck, wealth, relationships) and last but not least, may all my family be blessed with Great Health, Great Happiness and Great Wealth! Huat Huat Huat!

And before I end my post for 2011, I'll like to wish all of my blogger friends and visitors a Happy 2012! Here's a preview of what we had for New Year Eve's dinner ;) Bon appetit!


Sunday, May 29, 2011

Tonkatsu 豬排蓋飯

Shall be a short post cause my back's breaking from cleaning the house yesterday! The pictures will sum up what we had for dinner last night, including my Baby Kwok! We have been very adventurous to explore him to our food recently. I wonder if that's a good thing. Hmmmm.....


Yup! We had Tonkatsu for dinnner :) I played a litle trick on this - No, not about using frozen pork chop but instead of using my Don-pan (which I usually do for donburi), I merely fried the pork chop, cut and shove it on to the rice then pour the pre-prepared sauce over.


Alright, need to rest my aching back! Age's catching up I suppose!
To make this, you'll need:

  • Pork Loin, 180g - Pounded flat with a meat hammer (is that how you call that tool?)
  • 1 big Onion, sliced
  • Panko, 1 packet (Japanese Bread crumbs)
  • Plain flour 
  • 3 tbsp of Soy sauce
  • 50ml of water
  • 2 tbsp of sugar
  • Spring onions, sliced (for garnishing)
  • 1 beaten egg (for coating)
  • 1 lightly beaten egg (for the sauce)
  • 1 bowl of cooked Japanese rice
  1. Dust the Pork Loin with plain flour, followed by a layer of egg mixture and then covered well with panko. Set aside.
  2. Heat up a frying pot filled with oil (enough to cover the surface of the pork loin),  once temp is ready, fry the prepared pork loin till golden brown.
  3. Fill a bowl with rice. In a saucepan, pour soy sauce, sugar and water and bring it to boil. Add in the sliced onions and cooked till soft
  4. Stir in the lightly beaten egg and shut off the heat. Cut up the deep-fried pork loin and place it on top of the rice.
  5. Pour the sauce over and garnish with spring onions.

Monday, December 27, 2010

Oyakodon 親子丼

Remember I mentioned in my previous post that I cooked Oyakodon for X'mas dinner? Prince Charming's cousin paid us a visit and because we were pretty busy during the festive season, we decided to go simple rather than whipping up a table of food cause I'm pretty sure we'll not be able to finish them up.


I have done this Oyakodon umpteen times since this is one of Prince Charming's Top favourite list for Japanese food apart from the usual Japanese Curry. Enjoy!

Monday, October 25, 2010

Mrs Kwok finally cooks!

Yes, I finally cook something decent in the kitchen!!!! I can't even count with my fingers the number of cooking attempts I've tried, practically no time for my kitchen~

Prince Charming begged to have Japanese curry rice for dinner last Saturday and I thought okay, shouldn't be much problem and so off we went with Baby Kwok to Rivervale Mall to get our groceries for the meal.

End up, we went to Daiso and bought many other stuffs and gotten the time drifted away that I had to rush like mad to cook this meal! (Needed to go back to my parents' place to celebrate my sis's birthday!) Nevertheless, Prince Charming enjoyed this meal much as I do :) Baby Kwok is still too young to savour the Curry rice so let's wait till he is much older and I'll definitely cook for him. I bet he'll have the same taste as his dad! :D

On a hind note, this time round I used S&B Curry cubes rather than the usual Vermont one that I always use. I seriously much preferred Vermont one cause they seems thicker! S&B cubes seems to require lesser water than Vermont kind cause I cook the exact way I do for my Japanese curry but they turn out not as thick as we wanted. Hmmmm.. or maybe it's just my cooking skill that has deteriorated?


Sunday, December 20, 2009

Konnichiwa! An All Japanese meal

My company organized a Team building program where they hired a chef to teach us how to do sushi the other day. Although I sort of know how to roll a sushi but Prince Charming always fuss with the vinegar taste of my Sushi rice. He finds it not "sourish" enough and hopes that I can make some for him to try since he knew that I enjoyed myself during the Sushi session in the office.


Oh well, how can I reject him? I've not been cooking/baking much stuffs recently and since Sushi isn't something that will take up the whole day, I beam with joy and told him that we'll have a All Japanese meal! I decided to add in Japanese Potatoes Croquette and Chawanmushi (Japanese Steam Egg). With this packet of Spicy Garlic Tori Karaage lying in my freezer, I decided to use it up since it's going to expire in 1 month's time.

Here's our Japanese Cuisine feast! Itadakimasu!


I was so full up from the meal and oh, I added cheese in the Croquettes. Yummmmmyyy!

Friday, February 06, 2009

Yokoso Yokoso

I know it has been really....................................... long since I updated my blog.
Can't help it because time is never enough for me :(
I wish I could have 72 hours a day!

Anyway I made some sushi on Wednesday for dinner.
Finally, my rolling skill is improving! :D

Oh BTW, Evan commented that my sushi look more like Korean's Kimbap. Hehe!
I am nodding seriously cause, it looks like only the Kanikama and Tamago are relatively closer to the Japanese Sushi style. Tell me, when have you ever seen hotdog in Japanese Sushi? :P


Yokoso myself back to blogging! ;)

Friday, July 18, 2008

Itadakimasu!


Serves 1

IngredientsAmounts
Raw salmon3 small steaks
Salt1 tsp
Pepper1 tsp
Egg1
Salta pinch
Mirin2 tbsp
Cooked sushi rice1 bowl

Teriyaki sauce

IngredientsAmounts
Soy sauce1/4 cup
Mirin1/4 cup
Corn starch + Water2 tsp + 3 tsp

  1. Marinate the salmon steaks with salt and pepper. Set aside.

  2. In a bowl, beat up egg, salt and mirin. Heat up a pan over low heat, pour the egg mixture over and stir vigorously. You should get small crumbles of cooked egg.

  3. In a saucepan, pour mirin, corn starch and soy sauce and bring to boil over low heat. When the mixture starts boiling, arrange the marinated salmon steaks into it and allow simmering. The salmon should get cooked within few mins. Allow the salmon to continuing cooking in the sauce to enhance a better taste.

  4. Scoop the sushi rice into a bowl, top with "crumbled" eggs and top it further with Teriyaki Salmon steaks. Pour some remaining sauce over and ready for serving.


This was the dinner for my Prince Charming. The intention was to make some salmon sushi but, i think that would be more work for me, so I decided to change it to doing a Teriyaki Salmon Don.

Prince Charming always like food that comes with a little sweet taste so I think that's the main reason he always love Teriyaki!

Wednesday, April 09, 2008

Sakura Denbu Maki roll & Onigiri


IngredientsAmounts
Cooked calrose rice1 1/2cup
Sushi vinegar3 tbsps
Sakura denbu1/2 packet
Pork floss3 tbsps
Seaweed wraps3 sheets
Furikake2 tbsp


  1. Add sushi vinegar to the cooked rice and mixed well.

  2. Blend in the Sakura denbu and Furikake.

  3. Place a sheet of seaweed on to a clean tabletop, fetch some rice and spread across the seaweed. Roll up carefully. Cut into small pieces

  4. For pork floss maki roll, spread the pork floss on top of the rice and wrap carefully as the floss might drops out. Cut into small pieces.

  5. Using the remainder rice, with the help of a plastic cling, put the rice in the center of a piece of cling and wrap it up. Shape into triangular shape.


I made these for my lunch tomorrow. The sakura denbu was an impulse buy from Isetan while doing my grocery shopping 2 weeks ago. It was left sitting in my kitchen and I finally used it today. My intention was to make some sushi rolls but looking into my fridge, I guess it's time to replenish some food. There ain't much ingredients I could used for my sushi rolls and because I'm also plain lazy to cook, so I make Maki rolls!

The onigiris were the left over rice afte my maki rolls. I don't want to waste the rice and so I made them into my favourite "triangular rice balls". Looking at my bento, I know it's kind of too much for one's serving. I guessed I have to divide them into lunch and snack! Argh... am I going to lose weight or pile on more? Let it be - lose more pounds and inches off me, PLEASE!

Monday, January 21, 2008

Japanese Curry Rice


Makes 2 shares

IngredientsAmounts
Japanese Curry cubes
3
Mirin
3 tbsp
Water
2 cups
Diced daikon
Half of whole
Diced carrots
2
Sliced onions
1
Oil
1 tsp
Brown rice
2 bowls
  1. Bring the diced vegetables to cook by the boiling method. When vegetables are well cooked, drain and set aside.

  2. In a non-stick pan, drop oil and allow the oil to get hot on low heat. Add in the sliced onions and stir fry till soft and aroma is out.

  3. Stir in the cooked vegetables and blend well. Pour in water and allow the mixture to simmer.

  4. Cut the curry cubes into small pieces and drop it into the mixture. Stir well.

  5. Add in mirin for a sweeter taste. Allow the mixture to simmer for a few minutes.
    The mixture should get thicken.


Whipped up this dish of Japanese curry as our dinner for tonight. My Royal Prince Charming has a special devotion towards curry especially Chicken Curry and Japanese Curry. This is the nth time that he has requested Japanese curry for dinner.

One thing good about Japanese curry is that it is fast and easy. You can get it done within 30 mins provided you have the vegetables pre-cooked like how I always does the night before. The aroma of the curry always double the hunger crave. LOLX!

Anyway, unlike most Japanese curry, I have opted out the potatoes for Daikon instead. Daikon is also know as white Radish or White carrot to many old folks. It not only contain enzymes that aids in digestion especially starch, it is also very low in calories. I also opted for brown rice instead of the normal thai or calrose rice because brown rice is more nutritious.

Nevertheless, though my Prince Charming hated brown rice as if they stepped on his tail, he could simply lick his plates off with Japanese curry. The power of Japanese curry! Haha!

Thursday, December 20, 2007

Red Bean Mochi


Makes 12 Mochi

IngredientsAmounts
Glutinous Flour300g
Warm water200g
Sugar100g
Corn FlourA handful
Salad Oil1 Tbsp

Filling: Red bean paste
(I cooked the paste myself, you may get this in Phoon huat if you don't feel like spending time cooking it)

  1. Combine the flour, water and sugar together. Mix into a dough and knead till it is smooth and non-sticky.

  2. Bring the dough to steam. Chopsticks will come out with a transparent mixture when the dough is ready.

  3. Bring out the dough and put it a bowl grease with oil. Knead the dough till it becomes soft and spongy. Remember to use a glove when doing so as the dough is very hot.

  4. Cut the dough into small pieces and flatten it. Fill the center of the flattened dough with red bean paste and wrap it up.

  5. Coat the ready mochi with corn flour.

Red Bean Paste

You will need:

  • Red beans (1 packet)
  • Sugar (1 cup)
  1. Cook the red beans in a pot water till the beans become very soft. It took me half an hr to get it really soft.

  2. Drain any excess water from the red bean and combine the sugar. Stir constantly to make sure that the sugar get eaten into the red bean mixture.

  3. Leave to cook and fride it for usage.


I was watching one program from SCV a couple of days ago and they were teaching how to make Mochi at home. The steps looked simple thus I decided to try my hand on it since its not a working day.

I can say that kneading the dough is a tedious job because glutinous flour has a very sticky texture and it makes it very hard to knead when combine with water. Anyway, the mochi tasted good except that I need to improve my wrapping skills!

Thursday, August 09, 2007

Happy 42th Birthday Singapore!

It's National day! Yohooo, it's a PUBLIC HOLIDAY! Yohooo~~~ Oppsss..

Slept till 12pm today but was still so sleepy until daddy called and asked if we wanna go out. LOL~ I think my dad must be real shocked to know that I actually woke up in the afternoon cause I don't normally do that last time. I used to wake up like 8am on weekends but now, I think the earliest timing I've ever woke up is like 930am?

Well, all got to blame on my Hubby! He's always been an owl since his teenage days and so whenever I said that I wanna sleep, he will open his big eyes, stared at me and act kelian saying If I sleep, he'll feel lonely. SO..... I stayed with him throughout till like 1am? *Sleepy*

Anyway as promised, here's the pics of my onigiris~~


Shoyu topped with Seaweeds


What's with my expression?
OH! No make up! Look at that small eyes!
Eyes so small already still winked until like that!